Hjälp oss att förbättra vår webbplats!
Just nu samlar vi in feedback om vår webbplats för att kunna göra den ännu bättre. Hjälp oss gärna genom att svara på denna korta enkät. Tack!
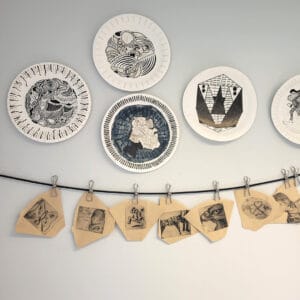
Exhibiting children’s art is essentially the same as exhibiting adult artists’ art, which means presenting and displaying it in the best possible way. There are some things to consider. Here are some useful methods.
Consider How to Display the Art Before You Begin!
If you know in advance that you will be exhibiting, it is good to think about how you will display the art. This will make things easier in the end. For example, consider the materials the children work with:


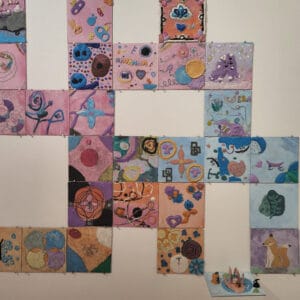


Mounting and Displaying


We use lighting to ensure the artworks are well visible. It sounds obvious, but creating good lighting can be a challenging task. There is a difference between ‘just lighting up’ and actively storytelling with light. In exhibitions, we can distinguish between ‘general lighting’ and ‘accent lighting.’
General lighting is unobtrusive; it makes the space bright and pleasant to be in.

Accent lighting can dramatize, for example, by spotlighting the artworks in a dark room.

Different Types of Light Sources
Start by checking which light sources are available in your exhibition space. A common scenario is that there are fluorescent lights, spotlights, and daylight from windows.
Fluorescent Lights
Fluorescent lights provide general lighting that illuminates the entire room to some extent. They can be turned on or off, depending on what else is available and the ambiance you want in your exhibition. Many refer to this type of lighting as ‘cleaning lighting.’

Spotlights Spotlights (or ‘spots’) are usually mounted on tracks on the ceiling. Spots can be moved within the tracks and rotated. This allows you to direct the light towards a specific artwork or part of the room. Some spots can also be dimmed.
Museums and art galleries often have very professional spots. They have small screens that can separate the light and the ability to insert colored filters. When placing and directing the spots, it is important to ensure that visitors will not cast shadows on the artworks when they stand in front of them.
Daylight
Daylight can make a big difference! Depending on the season and weather, the light from the windows affects the exhibition. There’s not much to be done about it. Sometimes there are blackout curtains. These can be useful if you want to darken the space and work with accent lighting.

What to Do If…
Perhaps you are exhibiting in a room with only regular ceiling lighting? In that case, there may not be much opportunity to influence the light. However, still consider where in the room the light is best for the artworks.
If you are exhibiting in a space where you can influence the lighting, take advantage of it! There may be both fluorescent lights and spotlights. Depending on what you want to convey, you can choose to use both the fluorescent lights and the spotlights. Or you might let the fluorescent lights be turned off. Experiment!
Tips for Writing and Designing Texts in Children’s Art Exhibitions
Exhibition texts are various types of texts that a visitor encounters in an exhibition. These can be on signs and in booklets.
You’ve probably read many interesting texts in exhibitions. But you’ve also likely encountered incomprehensible theoretical arguments and fact-packed texts that just make you tired!
Here are some concrete tips to capture your visitors and make it easier for them to engage with the exhibition.
Remember that a visitor often stands up and moves around. There may not be much time or peace to absorb the text. An adult reads about 250 words per minute. If a visitor spends 20 minutes in an exhibition and reads the entire time, they can read about 5000 words.
But hopefully, your visitors won’t just read; they’ll also have time to move around, look at various artworks, and perhaps chat with others. Therefore, you need to plan your texts to facilitate the visit and make the experience understandable (and hopefully memorable!). A good text is accessible to everyone and inclusive.
Tips
Watch out for:
Different Types of Texts in Exhibitions
Headings: 1-7 words
Headings divide different sections of the exhibition. Some visitors will be satisfied just reading the headings. Therefore, write them carefully!
Introduction Text: 20-125 words
Introduction texts should provide an entry into the exhibition. They contain many details, such as about the artists, theme, and materials. An important question to answer in the introduction text is: Who is behind the exhibition and why did they create it?
Theme Texts: 20-75 words
There may be a need for texts explaining sub-themes in your exhibition.
Example: If the children have tested different techniques for painting watercolors, explain the differences between the methods.
Here, the children have tried painting “wet-on-wet.” This means they first wetted the paper with water and then painted so the colors blend smoothly.
Stories: 20-75 words
You can advantageously let the children speak through narrative texts. Children and young people have much to say about their works! Talk to them and write down their quotes using conversational tone. Remember that children can also be heard through audio recordings or film!
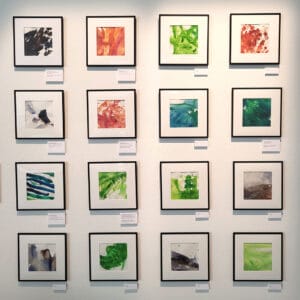
Captions: 20-75 words
Captions in an art exhibition are the small text labels next to the artworks. They contain the title of the work, the artist, technique, and possibly the creation year. These texts receive the most attention from visitors! Therefore, you can add some interesting or surprising information about the work.
Example:
Leofanten
Lisa Eriksson, 10 years old, Mellanskolan class 4
Mixed media with acrylic paint and collage
“My leofant has exactly 100 spots!”
In-depth Texts
Do you think some of your visitors are so eager to learn that they would enjoy more text? If so, create longer texts in a booklet or handouts that visitors can take with them.
Proper Line Breaks = Break lines when it feels right
You might wonder what this means. It means writing with pauses. Just as when you speak and need to pause or catch your breath, exhibition texts need pauses. You achieve this with line breaks. Proper line breaks are quite rare in art exhibitions. They are more common in historical museums, for example. But nothing prevents you from trying this approach in an art exhibition!
How to Write with Proper Line Breaks
Break the line at each phrase. If unsure, read the phrase aloud. You’ll notice when you naturally need to catch your breath. Never end a line with a preposition or “and.” Don’t hyphenate words.
The text will look more like a verse but will be easier to read. You can also use extra blank lines to make it even easier.
Example of an Introduction Text with Proper Line Breaks:
Our Journey to Ompibompi Land (heading)
One Monday in November,
it was dark and cold outside.
We were deciding on a theme
for our exhibition.
We children wanted to travel away
with the help of imagination
to a different fairyland.
There live the remarkable animals,
the rare plants and trees
that you probably never
heard of before.
Welcome to our Ompibompi Land!
Writing Actively
Write with active verb forms instead of passive! Take the opportunity to tell a story with lively language so the reader gets a picture and feeling of the events. This way, you highlight the children as active creators.
Example Passive Form:
These clay sculptures were created
over three weeks in November.
When the artworks had dried,
they were fired in a kiln.
Finally, they were painted with acrylic paint.
Example Active Form:
The children sculpted in clay
for three weeks in November.
When the clay had dried,
we placed the sculptures
in the large kiln.
The kiln’s temperature
was 1000 degrees
during the firing!
Then the kiln cooled slowly.
When we took out the sculptures,
they were still a bit warm.
Then the children painted their works
with acrylic paints.
They mixed colors
to create new shades
to make unique works.
Theme and Message
An exhibition often has a theme. Perhaps you have agreed to work on the theme “Space,” “Friendship,” or “Water.” A theme is broad and therefore might be vague for a visitor. Therefore, it’s helpful to think in terms of a message instead of a theme. What do you want to say with the exhibition?
A message is specific, it narrows down and focuses. While a theme consists of a word, a message consists of a sentence. A message can be a call to action, a question, or a perspective on the theme.
Examples of Shaping a Theme into a Message:
Theme: Space
Message: Join us on our rocket to outer space!
Theme: Friendship
Message: Let us tell you about friends and friendship
Theme: Water
Message: Solid, liquid, and steam – Welcome to our water world
Book Tips
Att skriva om natur
Thomas Öberg, SLU
This very educational text is about nature, but everything is fully transferable to art!
Smaka på orden – Om texter i utställningar
Ekarv, Olofsson and Ed
Here is a blog post about how the open-air museum Den Gamle By in Aarhus improved their exhibition texts.
Words and text
Sofie Bergqvist specializes in exhibition texts. She conducts courses and workshops in writing. Among other things, she has conducted workshops for participants in Bästa Biennalen.

Signs on Foamboard For extra nice signs, you can use foamboard (also known as foam core or Capafix). It is a rigid lightweight board with cardboard on both sides. The signs become light, flat, and stand out a bit from the wall. This way, you can create extra stylish signs and give the exhibition a more professional look.


When using foamboard, it’s perfectly fine to mount a regular thin printout! Making signs on foamboard requires some practice. But once you master it, you can create very attractive signs!
Foamboard can be ordered in A4, A3, and even larger sizes (though keep in mind that larger sizes are cumbersome to handle). Different thicknesses may be available. A thickness of 5 mm is suitable for signs.
Foamboard is available both without an adhesive surface and with (called self-adhesive or pre-adhesive). The self-adhesive ones are most practical for signs, so be sure to check this when ordering. This way, you avoid dealing with glue that can get messy and create wrinkled surfaces. However, foamboard is only for indoor use. Unfortunately, it is also quite expensive!
Outdoor Signs
Of course, you want your exhibition to attract people to come in! Here are some simple tips.
A-Frame Signs An A-frame sign is very useful! You can insert a large exhibition poster that welcomes the visitor. If it’s an opening, you might want to tie a bunch of balloons to it.

Beach Flag A beach flag consists of a base, pole, and flag. Consider that you might want to use the same flag for different exhibitions or events. Therefore, you should order a beach flag with a simple message that suits all occasions. For example: “Welcome In!”

Strings with Pennants Strings with pennants are a simple way to create a festive atmosphere.

Notice Boards Unfortunately, there aren’t many notice boards left in our public outdoor spaces. But if there are, use them. Laminate an exhibition poster so it lasts longer.

Recycle Old Signs
Some organizers print simple signs on “corrugated plastic” that are mounted on simple stands. The stands are then pushed into the ground. Real estate agents often use this type of sign for viewings. Keep an eye out and ask if you can collect old signs to reuse.

Press Viewing and Press Release
Create buzz around your exhibition by inviting the press to a viewing! It may sound daunting and unfamiliar, but it’s both fun and worth the effort. Write an irresistible press release. Here are some tips!
In the best-case scenario, several reporters will attend! They will want to talk to the children and likely the responsible educator as well. It will be exciting for the children to meet a real journalist and talk about their artworks.
In the worst-case scenario, no one has time to come. But don’t despair; the press release can still result in a short article or notice. All attention is good! A hot tip: Let the children call some reporters! Or why not, have them write a handwritten message that you include in the press release.
If possible: Leave it open for reporters to visit at another time, perhaps when the exhibition is running.
Who should you contact?
Brainstorm which editorial offices to contact. These could include:
Send the press invitation a few days in advance. Then send a reminder the day before. Remember that the article or report should come out before the opening, so check which days the newspapers are published. If you have personal contacts, use them. Ask colleagues and acquaintances for good press contacts. If not, call the editorial office and ask to be connected to someone covering your area.
A vernissage is the first public showing of an exhibition. The word comes from the French word “vernis,” which means varnish (a clear lacquer).
The term vernissage is old and dates back to the time when artists would varnish their paintings just before the exhibition opened. The strong smell of varnish would fill the room. Today, few use varnish, but the word vernissage is still very popular. Use it! It gives a festive impression.

It’s nice to have someone inaugurate the exhibition by saying a few words and maybe cutting a ribbon. Sometimes there are musical performances, poetry readings, or discussions. Talk to the children about how they want their vernissage to be.
At the vernissage, it’s pleasant to offer some bubbly drinks and snacks.

Be prepared with vases, as it’s very possible that some visitors will bring flowers!

It’s a good idea to get a guest book! A nice memory is to first paste a vernissage card from the exhibition into the guest book. Have a working pen on hand!

Don’t forget a visitor counter or a list where you can count the visitors.
Before the vernissage, send out invitations with a vernissage card.
En vernissage or ett vernissage?
Enligt ordboken heter det en vernissage. Men språket utvecklas och idag säger många ett vernissage. Båda funkar!
According to the dictionary, it is “en vernissage”. But language evolves, and today many say “ett vernissage”. Both are acceptable!
Finissage
Many art exhibitions conclude with a finissage. This takes place on the last day of the exhibition. Something extra fun might happen then, such as a tour or a workshop.
An exhibition is not just for viewing! Engage visitors in various ways to make the visit more memorable, especially if they get to do something hands-on. Here are some tips!
Invite people to guided tours. You might want to offer special tours, such as family tours or stroller tours (for parents on parental leave).
Consider inviting a guest to conduct a tour. It can provide different perspectives and new insights into the art on display.
Having a space where visitors can sit down and create or simply take a break is very appreciated. Some love to create freely, while others enjoy a challenge.
Think about what might suit your exhibition. Lay out materials, but make sure it’s easy to get started. Visitors shouldn’t need to read complicated instructions.
Also, consider the time aspect! Some visitors might not have much time but still want to create something. Therefore, avoid materials with long drying times, such as liquid paints.
Children often want to take their creations home. It’s appreciated if there are simple bags to put their creations in. But it’s also nice if some want to leave their works behind as inspiration for others.

Art Keys Art Keys are a common way to engage visiting children. The keys consist of detailed images from various artworks in the exhibition. They are printed, laminated, and collected on a keychain. Children get a keychain and then search for the artworks.
Photograph by Theme Children with access to a mobile camera can be given a thematic challenge. Write slips with different themes and place them in a bowl. Children draw a theme and then go around the exhibition taking pictures on that theme. Here’s an example on the theme Red.


Ask a Question Encourage visitors to answer a question or express their thoughts and ideas, for example, on post-it notes. Prepare a place where they can post their notes for others to see.

Find a Sculpture that Represents How You Feel Photograph it and describe in a few words why that sculpture represents how you feel.
Which Artwork Would You Like to Have at Home? Photograph it and write a few lines about why you think that artwork would fit in your home.
Use Your Imagination!
Smell Choose an artwork in the exhibition. If you imagine, how would the artwork smell (if it had a smell)? Do you smell wet autumn leaves? Freshly baked waffles? Try to describe the smell with a few words. Photograph the artwork!
Touch Choose an artwork in the exhibition. If you imagine, how would it feel to walk around in it? Would it be slippery? Cooling? Soft like velvet? Try to describe the feeling with a few words. Photograph the artwork!
Hearing Choose an artwork in the exhibition. If you imagine, what sounds do you think of? Do you hear birds chirping? A motor roaring? Try to describe the sound with a few words. Photograph the artwork!
It’s important to document an exhibition! Both exhibitors and organizers benefit from having a recorded memory of the exhibition for the future. This way, you can look back on your achievements and enjoy the feeling of having accomplished something significant. Additionally, documentation can be helpful for future exhibitions.
Portable Multifunctional Exhibition Platform
The Cultural Association MedVind owns a multifunctional exhibition platform. It is available for rent!
The platform can be used for design, art, crafts, or sales. It is easy to vary and adapt to the exhibition items and space. Moreover, it is very easy to transport. This provides great freedom to create temporary exhibitions wherever the audience is at the moment.
The platform was developed by the Cultural Association MedVind in collaboration with Stoft Studio in 2018. A few years later, it was further developed by craftsman Christian Svensson from Lunds Öppna Verkstad.


An Exercise – Solve Tricky Situations

Discuss and sketch proposals on how you can solve the following situations:
You have received a request from the local library that wants to exhibit children’s art with the theme “My Friend.” Two Year 4 classes have explored the theme and submitted 50 children’s drawings on A4 copy paper.
How will you display the children’s drawings to make the exhibition interesting for visitors? There is no budget except for your usual basic materials.
You have collaborated with the local nature school and 20 children. You have created sculptures from natural materials. The local shopping centre will provide a vacant shop space for the exhibition for about a month. The space is open to enter, not staffed, but there are guards in the shopping centre. The sculptures vary in size from a shoebox to a crate.
How will you display the sculptures? How will you attract visitors?
The cultural department wants children’s art to be visible in the municipal hall’s lobby. They have found an old display cabinet with locks and a daylight lamp in which the art will be shown. You teach a group of 10 children at the cultural school. You have 1000 SEK for materials.
What are your thoughts?
You have 30 children in the group who have created ceramic sculptures. The items are about the size of cauliflower heads. The Museum of Sketches has invited you to exhibit. The exhibition should be interesting for their audience. Of course, there is an exhibition technician at your disposal.
What suggestions do you have?
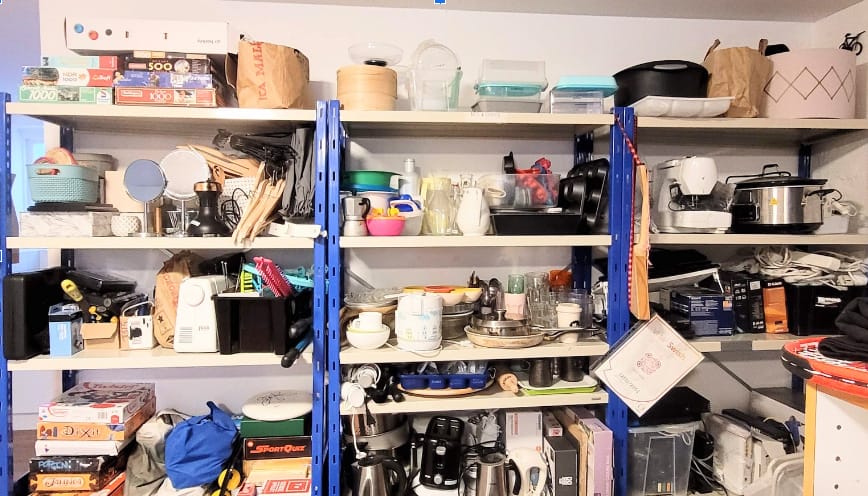
You have access to this storage room. Select at least five items and sketch how they can be used to display children’s art in the local art hall. You have a 3×3 m space. What type of works would be suitable to display? There is no budget except for your usual basic materials.